|
|
本帖最后由 kaillen 于 2020-5-20 13:38 編輯
一,打開文件(可以隨文下載放置在文檔中打開)。(如下圖1所示)
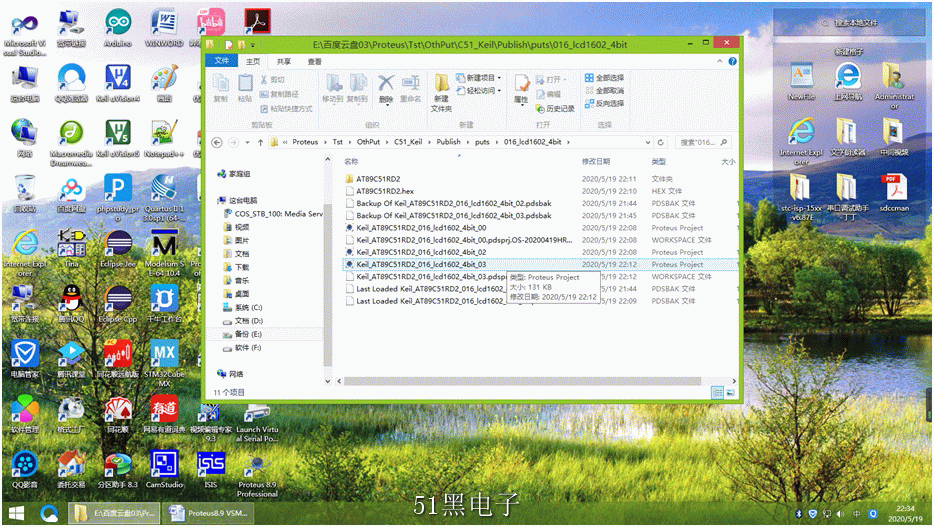
圖1
二,調整原理圖大小,適合可視,另存工程文件。(如下圖2,3,4所示)

圖2
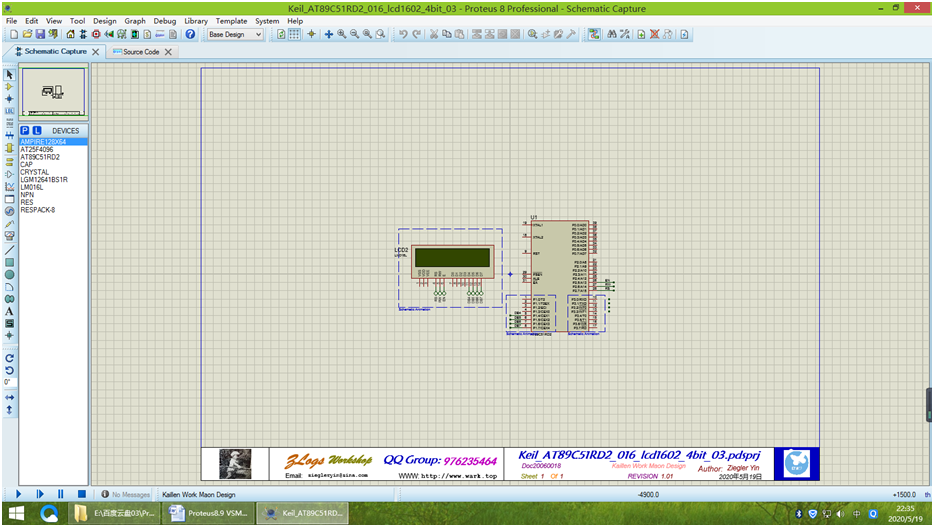
圖3
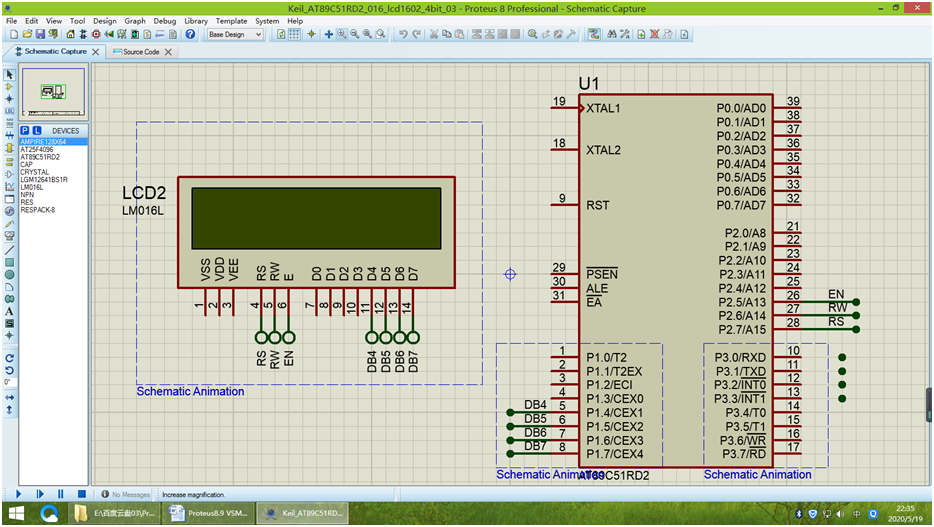
圖4
三,點擊Source Code標簽。(如下圖5所示)
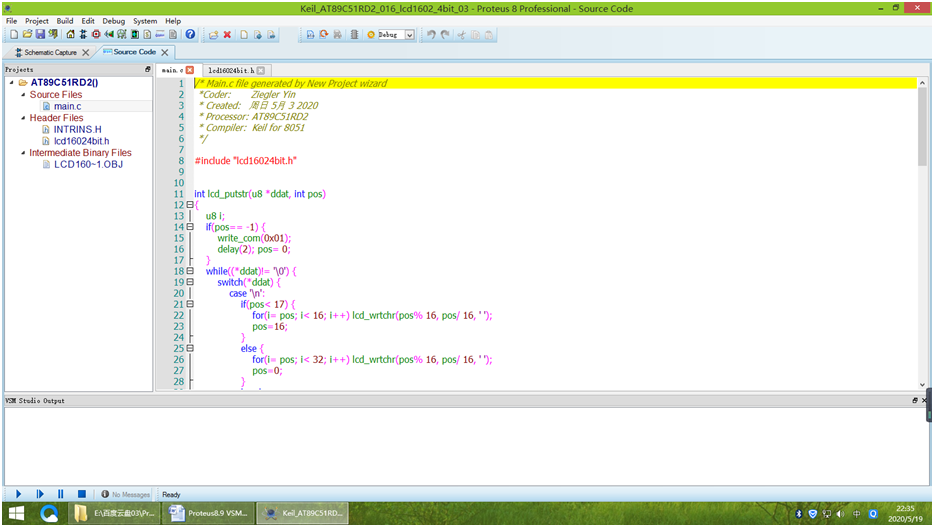
圖5
四,編輯main.c 代碼如Proteus8.9 VSM Studio Keil編譯器仿真AT89C51RD2系列016_lcd12064bit (如下圖6所示)
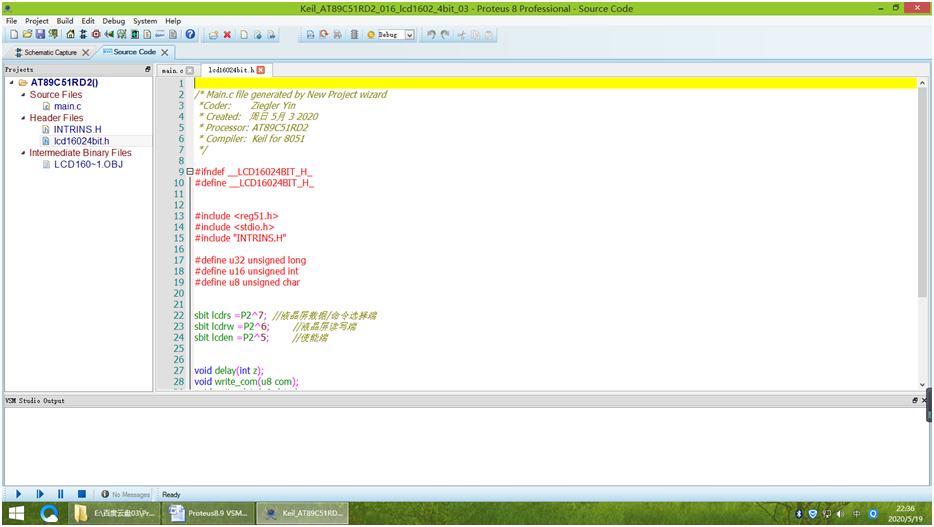
圖6
五,Main.c 代碼:
/* Main.c file generated by New Project wizard
*Coder: Ziegler Yin
* Created: 周日 5月 3 2020
* Processor: AT89C51RD2
* Compiler: Keil for 8051
*/
#include "lcd16024bit.h"
int lcd_putstr(u8 *ddat, int pos)
{
u8 i;
if(pos== -1) {
write_com(0x01);
delay(2); pos= 0;
}
while((*ddat)!= '\0') {
switch(*ddat) {
case '\n':
if(pos< 17) {
for(i= pos; i< 16; i++) lcd_wrtchr(pos% 16, pos/ 16, ' ');
pos=16;
}
else {
for(i= pos; i< 32; i++) lcd_wrtchr(pos% 16, pos/ 16, ' ');
pos=0;
}
break;
case '\b':
if(pos>0) pos--;
lcd_wrtchr(pos% 16, pos/ 16, ' ');
break;
default:
if((*ddat) < 0x20) {
*ddat= ' ';
}
lcd_wrtchr(pos% 16, pos/ 16, *ddat);
pos++;
break;
}
*ddat++;
}
return (pos);
}
int lcd_putnum(u32 num, int XS, int pos)
{
u32 tmp= 0;
u8 numbits= 0;
if(pos== -1) {
write_com(01);
delay(2); pos= 0;
}
if(num== 0) {
lcd_wrtchr(pos% 16, pos/16, '0');
pos++;
}
else {
if(num< 0) {
lcd_wrtchr(pos% 16, pos/16, '-');
num*= (-1);
pos++;
}
while(num) {
tmp= tmp* 10+ (num% 10);
num= num/ 10;
numbits++;
}
while(tmp) {
lcd_wrtchr(pos% 16, pos/16, (tmp% 10) +48);
tmp /=10;
pos++;
numbits--;
if(numbits== XS) pos= lcd_putstr(".", pos);
}
while(numbits--) {
lcd_wrtchr(pos% 16, pos/16, '0');
pos--;
}
}
return (pos);
}
void main(void)
{
init();
while(1){
LClear();
delay(500);
lcdStr(0, 0, "Kaillen Work");
lcdStr(0, 1, " Wellcom YOU!");
delay(5000);
LClear();
delay(500);
lcdStr(0, 0, "Code Made");
lcdStr(0, 1, " --Ziegler Yin");
delay(5000);
}
}
Lcd16024bit.h:
/* Main.c file generated by New Project wizard
*Coder: Ziegler Yin
* Created: 周日 5月 3 2020
* Processor: AT89C51RD2
* Compiler: Keil for 8051
*/
#ifndef __LCD16024BIT_H_
#define __LCD16024BIT_H_
#include <reg51.h>
#include <stdio.h>
#include "INTRINS.H"
#define u32 unsigned long
#define u16 unsigned int
#define u8 unsigned char
sbit lcdrs =P2^7; //液晶屏數據/命令選擇端
sbit lcdrw =P2^6; //液晶屏讀寫端
sbit lcden =P2^5; //使能端
void delay(int z);
void write_com(u8 com);
void write_data(u8 date );
void SetCursor(u8 ix, u8 iy);
void lcd_wrtchr(u8 X, u8 Y, u8 recd);
void lcdStr(u8 x, u8 y, u8 *str);
void init(void);
void LClear(void);
#endif
六,點擊構建工程按鈕,編譯工程。(如下圖7所示)
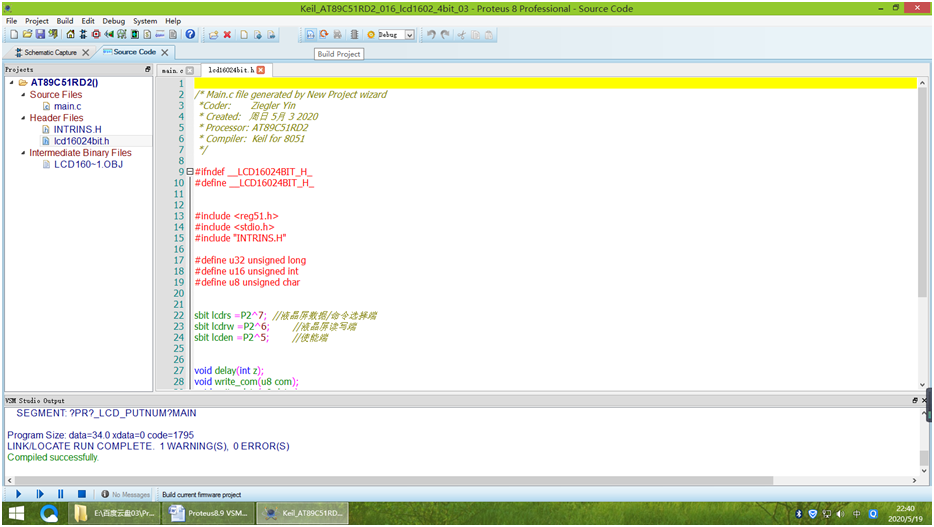
圖7
七,點擊窗口左下方仿真按鈕,可見lcd16024bit屏上信息顯示在屏。 (如下圖8,9,10所示)

圖8

圖9
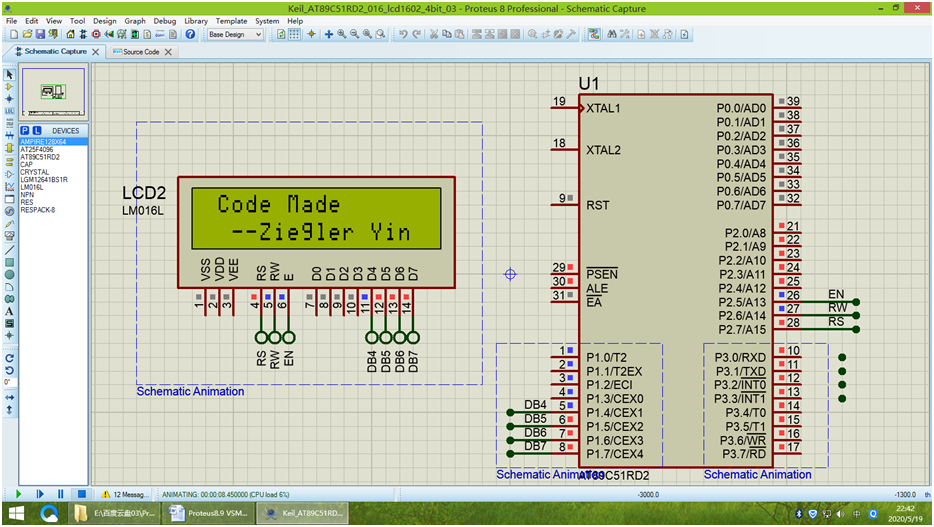
圖10
八,選擇release,點擊構建工程按鈕,編譯工程生成Hex文件。(如下圖11所示)

圖11
九, 系列的001-003虛擬仿真與開發板對應已證明:虛擬仿真程序對于開發板有效,之后不再➕上下載到開發板的介紹。
附件Proteus8.9 VSM Studio Keil編譯器仿真AT89C51RD2系列016_lcd12064bit在已安裝Proteus8.9的計算機文件夾中打開即可
需要進一步了解,請加入QQ群:976235464
|
評分
-
查看全部評分
|